Jupyterlab on Elja
These instructions show you how to set up a non-browser based Jupyterlab on a compute node, and how to connect to it with a browser on your local computer. This is accomplished in four steps.
The following instructions work on a Unix/MacOS system. Remember to change uname to your username.
1) Set up Jupyterlab with Conda:
Log into Elja and set up your jupyterlab environment using conda.
[..]$ module load Anaconda3/2022.05
[..]$ conda create -y -p $HOME/conda/env_jupyter
[..]$ conda activate $HOME/conda/env_jupyter
[..]$ conda install -c conda-forge jupyterlab
It is important to run all package compilations on the log-in node before deploying this environment on the compute nodes.
In this example Python and tsne python package are built in the jupyterlab environment
[..]$ conda install python=3.9
[..]$ pip install --upgrade pip wheel setuptools
[..]$ pip install jupyter
[..]$ conda install -c conda-forge tsne
2) Open an Interactive Session and Deploy Jupyterlab Notebook
In this example 24 cores of a compute node from partition pname is requested with 3.9Gb per core.
$ srun --job-name "Jupyterlab" --partition <pname> --cpus-per-task 24 --mem-per-cpu 3900 --time 1-00:00:00 --pty bash
It is important to adjust the number of cores (and memory per core) according to your needs! Don't allocate unnecessary processing power. See here for partitions and specs.
Activate the jupyterlab environment
[<uname>@compute-#]$ module load Anaconda/2022.05
[<uname>@compute-#]$ conda activate $HOME/conda/env_jupyter
Deploy a jupyterlab notebook on the node, with no browser
[<uname>@compute-#]$ jupyter-lab --port 8888 --no-browser
There will be a lot of output, but the important output is the second to last jupyterlab url underlined here:

3) Establish a Tunnel to the Compute Node
Open up a new terminal window on your local computer and establish a double tunnel
[..]$ ssh -t -t <uname>@elja.hi.is -L 8888:localhost:8888 ssh compute-# -L 8888:localhost:8888
Note that compute-# must match the name and number of the compute node allocated for the interactive run.
Leave the terminal window open, and open up a browser on your local computer.
4) Open Jupyterlab-Notebook on your Local Computer
You can now open up a browser on your local computer, and copy-paster the the jupyterlab url into your browser:

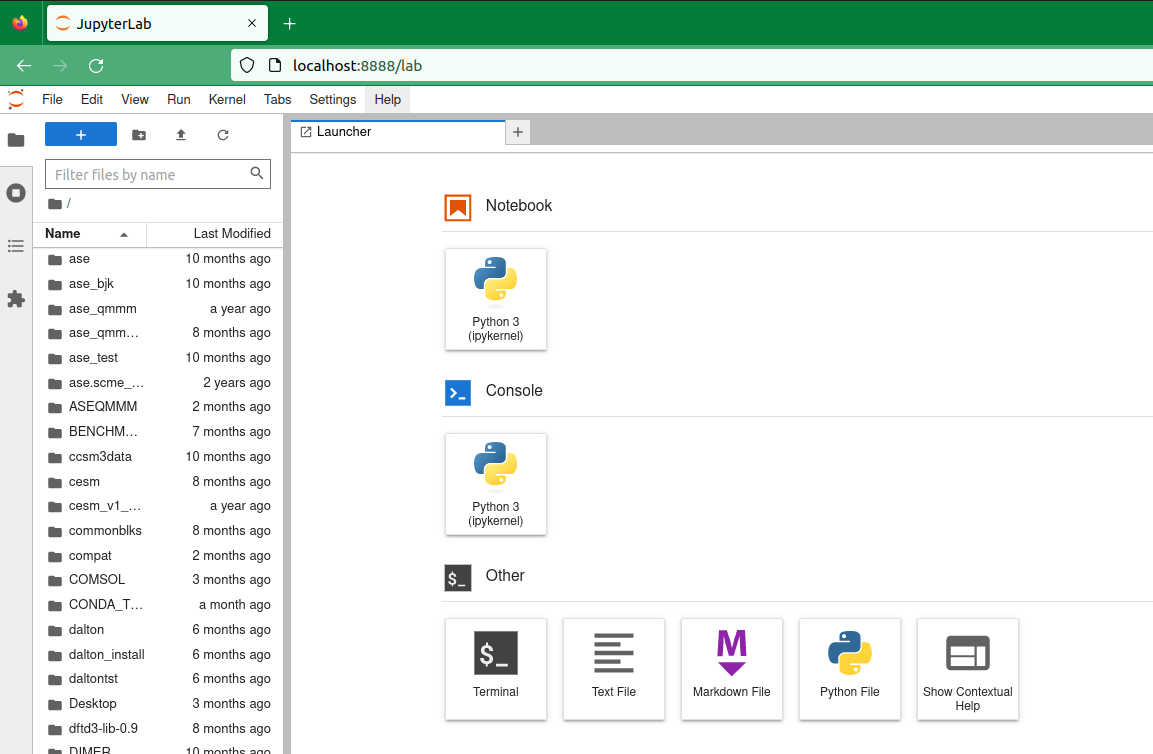
Press enter, and your jupyterlab notebook, running on the compute node, is now active in your local browser:

It can happen that the port 8888 is occupied somewhere along the double tunnel. In this case simply choose another (similar) port number, for example 8889, and start again with activating a jupyter-lab notebook, last part of step 2), followed by a repeat of steps 3) and 4).